MPEM Conversion Kit for 1995/1996/1997 Sportster

Offered here is a replacement for the very expensive and now discontinued 278000571 / 278000790 / 204470035 mpems used with the 1995/1996/1997 Sportster Jetboats.
Note too I use a new aftermarket mpem for this conversion so no need to include your dess lanyard when you send in your bad mpem. Any dess lanyard will work with the conversion.

Below is a picture of the conversion you'll receive back ready to install.

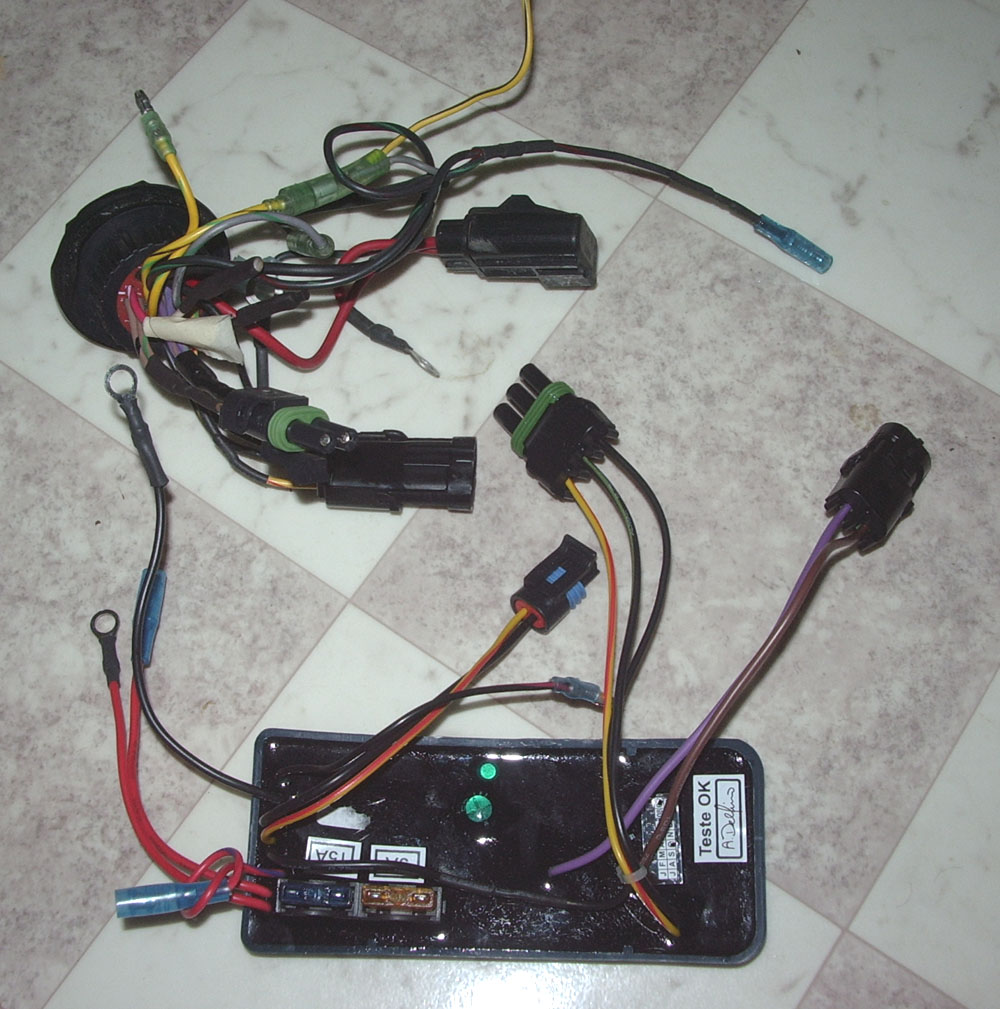
With this conversion, if you ever have a mpem go bad again, it can easily be removed and a replacement can be installed. The system also utilizes Weatherpak waterproof connectors better than oem to make connecting/disconnecting easy!

The only thing you'll need to remember when running your boat with any conversion kit installed is that there's now no neutral safety feature. That means the boat will start in gear. Also since that's been eliminated, there's also no neutral/reverse rev limiting. That means you need to be careful and not apply full throttle when backing or you could damage the reverse components. As long as you keep that in mind though, you shouldn't have a problem.

Kit Price - $299.99 inc. shipping
e-mail for kit purchase info

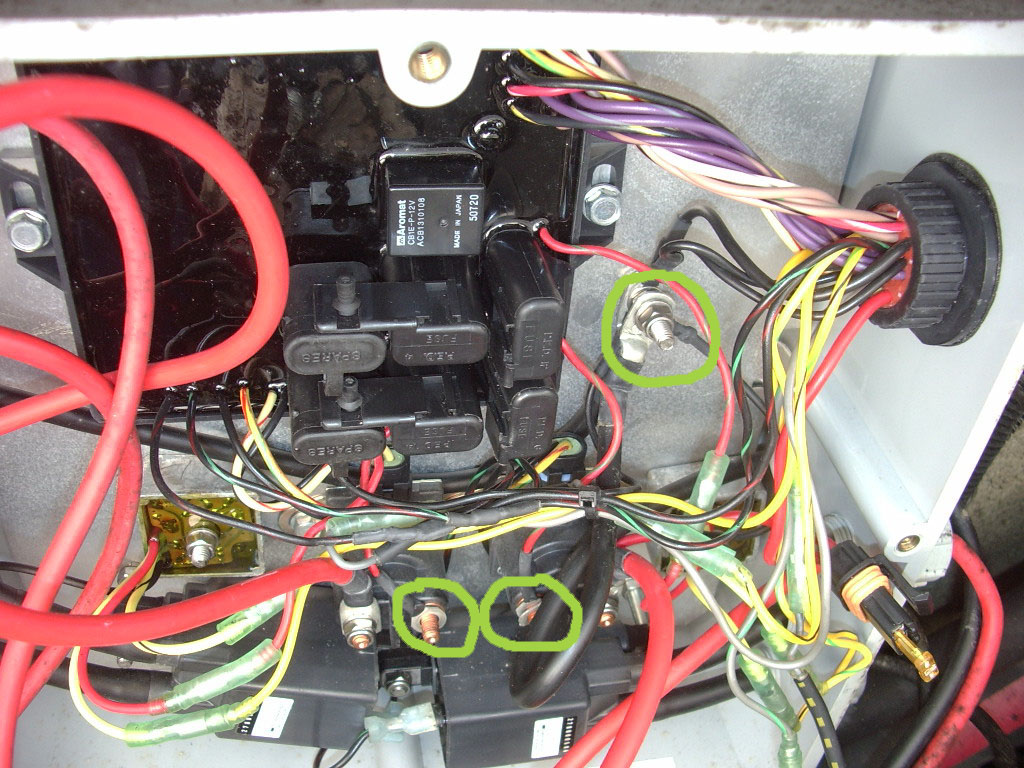
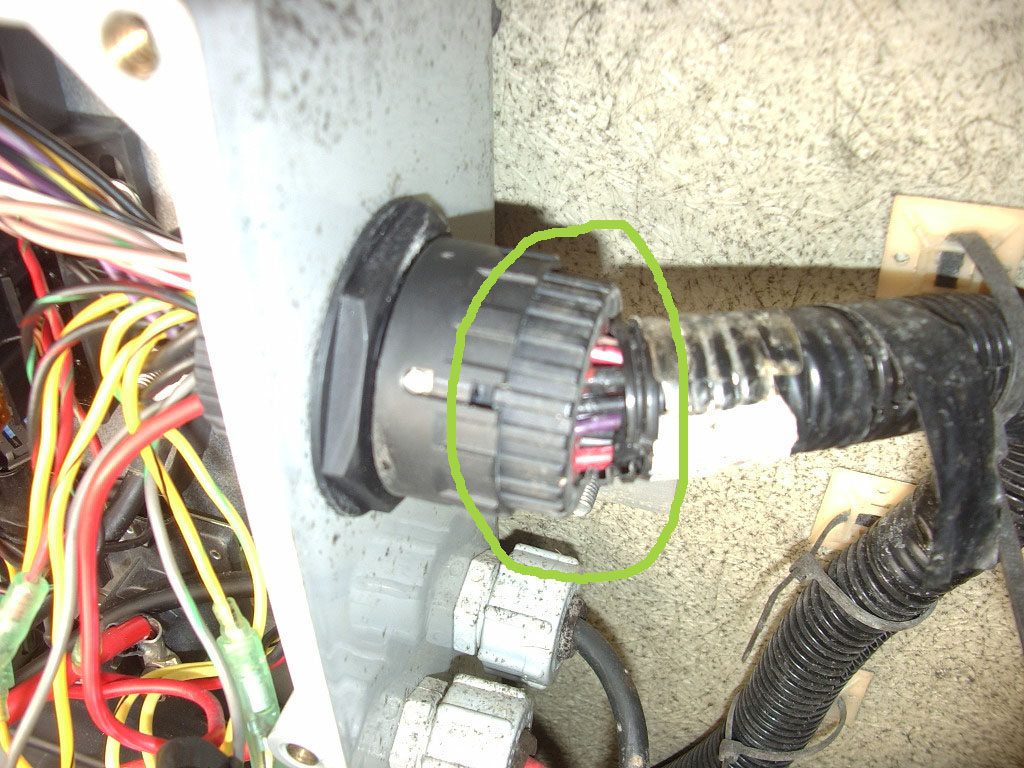
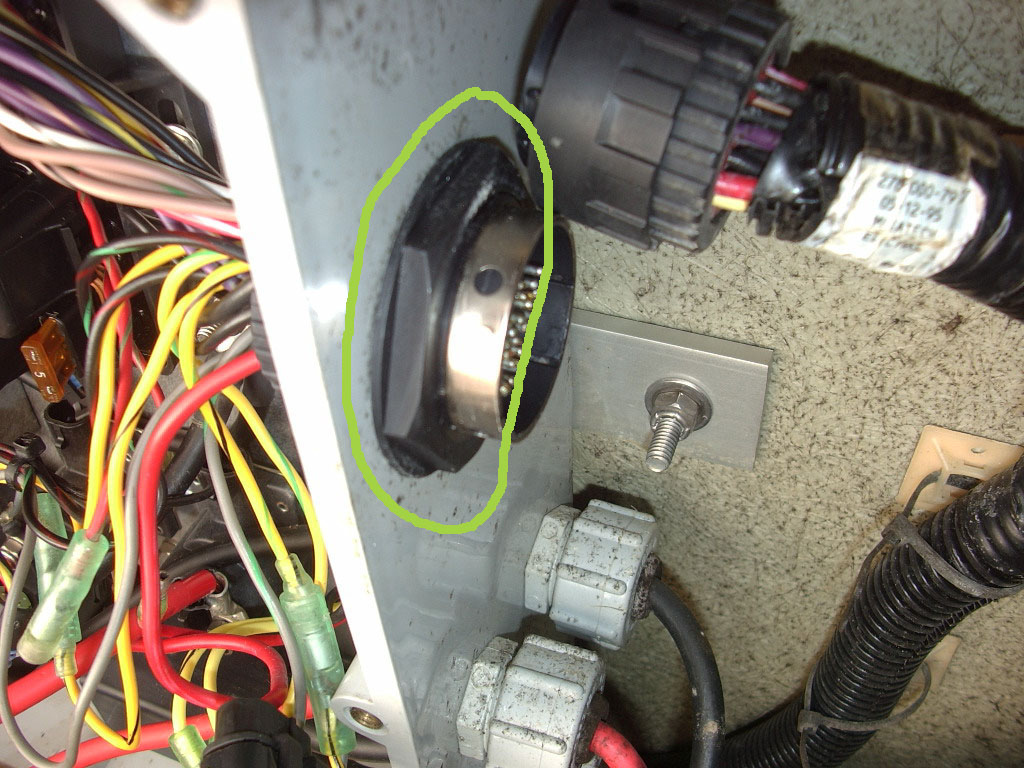
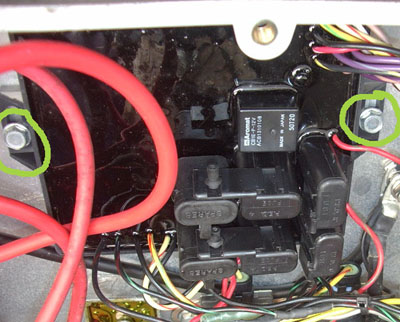
Below are instructions for removing your bad mpem to be sent to me as well as procedures for installing my mpem conversion kit built for the 1996 Sportster Jetboat.


BAD MPEM REMOVAL...

Tools needed:

Procedure:

  1. Using the 10mm ratchet, remove the positive battery cable from the battery.

  2. Using screwdriver and/or square bit with ratchet, remove the cover from the grey electrical box.

  3. Using the 10mm ratchet, remove the ground nut and the nuts on the two start solenoids so you can remove the grounds and positive wires from the mpem and main round connector.


    (1996 Speedster mpem pictured)

  4. Unplug all waterproof bullet connectors on wires coming from the mpem and from the main round connector. Also unplug the two connectors going to the DC-CDI module.

  5. On the outside of the box, turn the ring on the main harness connector to release the main harness from the mpem connector.

  6. Using large pliers or channel locks, remove the large nut retaining the mpem connector to the grey box.

  7. Using the 10mm ratchet, remove the two bolts retaining the mpem to the aluminum plate then the mpem should come loose and out. If you missed disconnecting any wires, you'll find out now!

  8. Send the mpem in to me for conversion per the instructions you've received via email.


MPEM CONVERSION KIT INSTALLATION...

Tools needed:

Procedure:

    NOTE - You also should thoroughly check your electrical system including stator, rectifier, wiring, and other components to make sure they're ok BEFORE installing one of these conversions. The reason is that if one of those components is bad, it can damage the conversion and may actually have been the cause of your original mpem failing. Since there's no warranty of any kind on Sea Doo electrical parts, this is a very important step that shouldn't be skipped!

  1. Reinstall the modified mpem connector and large nut that retains it.

  2. Grasp the replacement mpem assy firmly and remove the protective plastic from the module to expose the adhesive on the double sided tape/Velcro.

  3. Being careful not to stick in the wrong place and making sure all wires reach their respective connection points, insert the mpem into the box and center near the top of the box then press firmly on the module to attach to the aluminum plate.

  4. Connect start solenoid connector, coil connector, and other connectors matching to their appropriate colors. Also reinstall any ground wires on the stud as well as positive wires from the mpem to their proper place on the start solenoid terminal.

  5. Once all connectors and terminals are in their proper places and any nuts tightened, use zip ties to retain wires so they can't move/vibrate when running. That will keep you from having any strange electrical gremlins in the future and makes for a nice looking conversion too!

  6. Once all is back together and before reinstalling the grey cover, reconnect the battery and test the system for proper start/stop and gauge operation.

  7. If all's well, reinstall the cover and you're ready to run!


    NOTE AS IS THE CASE WITH YOUR LOCAL DEALER, THERE ARE NO WARRANTIES/RETURNS ON THIS MPEM CONVERSION OR ON THE MPEM(S) IT'S BUILT WITH. THE REASON IS THAT I CAN'T RETURN ONE TO MY SUPPLIER AND SINCE YOU'RE THE ONE WHO NEEDS TO GET BACK ON THE WATER, YOU'RE ULTIMATELY THE ONE WHO TAKES ON ANY AND ALL RISK IN PURCHASING ONE OF THESE. ALL MPEMS ARE TESTED AT THE FACTORY TO BE IN PROPER WORKING ORDER AND IT DOESN'T HAPPEN OFTEN, BUT OCCASIONALLY A DEFECTIVE ONE MIGHT SLIP THROUGH. THEREFORE UNDERSTAND YOU DO GAMBLE A LITTLE PURCHASING ONE OF THESE SO TAKE THAT INTO CONSIDERATION BEFORE ORDERING. ALSO REMEMBER IF THERE'S ANY OTHER PROBLEM IN THE ELECTRICAL SYSTEM ON YOUR BOAT OR IF IT'S INITIALLY CONNECTED WRONG, YOU MIGHT DAMAGE THE MPEM(S).


    More Tech Info
    OSD Marine