Anti-Rattle Kits for older Sea Doo PWC
NOTE - I no longer offer new parts but try OSDparts.com for these kits below.
Have you noticed excessive driveline noise in your older Sea Doo? The noise sometimes comes from excessive play in the pump due to the poor design of the pump cone on older style pump housings. This kit includes almost everything you need to convert your old pump cone to the newer style that incorporates the Anti Rattle spring loaded plunger. This quiets the driveline noise down somewhat as well as adding oil capacity to the pump. The main benefit though is this new design cone assy keeps the thrust bearing preloaded. That’s very important for improving the life of the bearing and impeller shaft and is why all pumps after 1996 have some style of pusher incorporated in their cone.
These kits below work with most 140mm pumps on SP SPI SPX XPI XP GTS GTI GTX GS GSX Explorer and others excluding large hub RFI pumps. The included bottle of Klotz Synthetic Oil is also enough for at least one and maybe two oil changes depending on your model. Before purchasing, make sure that your pump doesn’t already have the new style system installed. If it has a short impeller cone or a long cone with no pusher feature, this new kit is what you need!
-
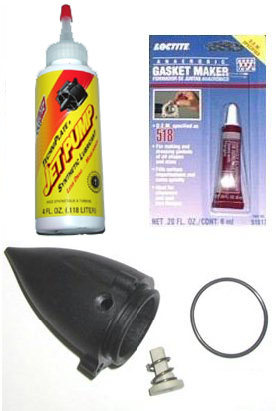
Included in the BASIC Kit pictured below
- Improved Impeller Cover with Spring Pusher
- New O-Ring
- 4oz Klotz Synthetic Jet Pump Oil. Klotz TechniPlate oil has anti-foam additives and is formulated to preserve seals as well as protect against bearing wear so you get more life out of your pump!
- Loctite 518 (or equivalent) sealant
-
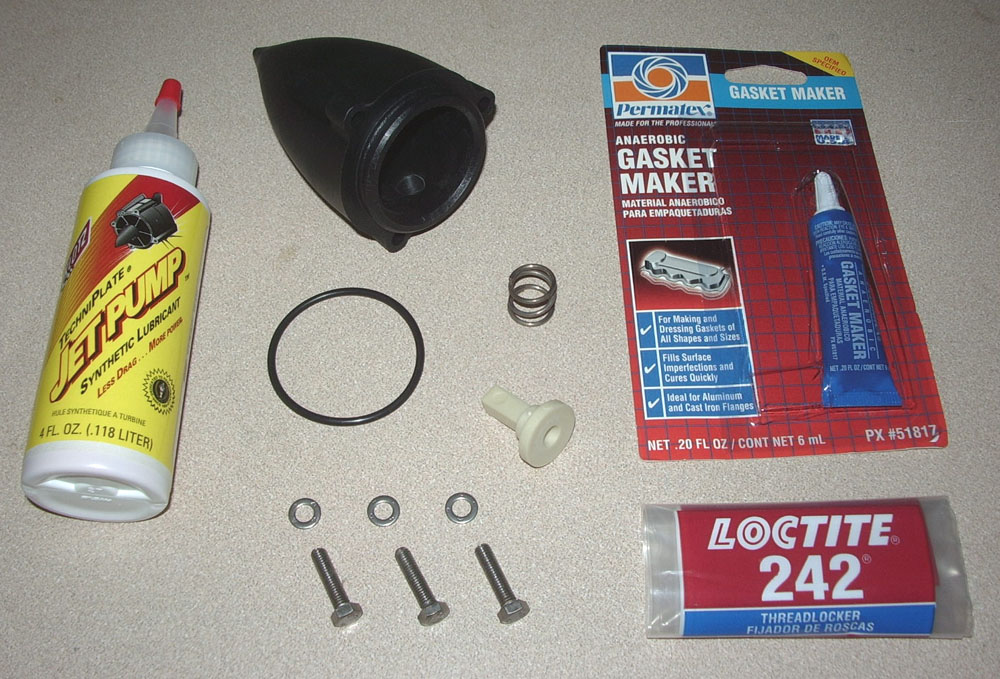
Included in the DELUXE Kit pictured below
- Improved Impeller Cover with Spring Pusher
- New O-Ring
- (3) New Stainless Hex Cone Bolts
- (3) New 5mm Stainless Washers
- 4oz Klotz Synthetic Jet Pump Oil. Klotz TechniPlate oil has anti-foam additives and is formulated to preserve seals as well as protect against bearing wear so you get more life out of your pump!
- (1) Tube Loctite 518 (or equivalent) sealant needed for sealing o-ring.
- (1) Tube Loctite 242 (or equivalent) sealant needed for retaining bolts
(click on image to see full size)