Procedure for VTS Boot Installation.
This procedure is for the installation of a OSD Marine VTS Boot Kit on PWCs equipped with the combination module/motor. If you haven't checked yours lately, it's recommended. If yours is still held on with hose clamps instead of the updated plastic clamps, you need to fix it before you have serious damage due to leakage!
Tools needed:
13 mm socket with ratchet and 10" extension (or longest you have)
10 mm wrench
1/4" Ratchet with 10mm Socket
1/4" Socket
Channel Lock Pliers
Nozzle Removal:
Nozzle removal isn't absolutely necessary, but makes installing the boot much easier. While you have it off, you might think about changing the pump oil as well.
- Remove steering cable at connection to the nozzle, using 10 mm wrench and ratchet. Next, remove the trim rod connection at the trim rod using wrench and ratchet.
- Using 13 mm ratchet, remove 4 bolts attaching nozzle to pump, and remove nozzle, being careful to catch 2 o-rings at the top (newer models don't have these).
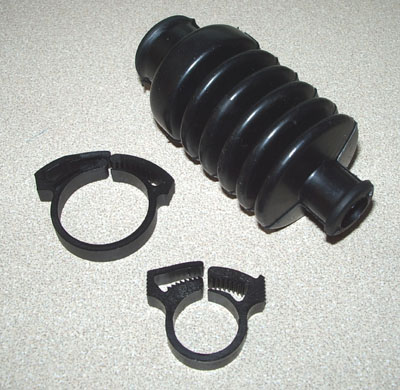
VTS Boot Installation:
- Using the 1/4" socket, you should be able to remove both hose clamps using your fingers. They are really hard to get at using a screwdriver, but you could go that route too if the socket by hand trick doesn't work.
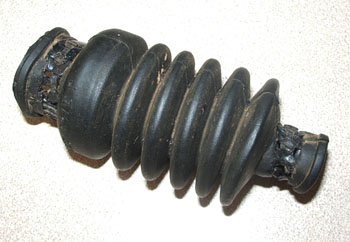
- Pull off the old boot and inspect. If it has holes in it, you'll need to remove the VTS Housing cover and make sure no moisture is inside. If you find moisture, make sure to let dry and maybe spray some Sea Doo Lube on the motor to protect it. The picture below is what a bad one looks like.
- You now can install the new boot with large clamp. Once you have the boot all the way on the retaining flange, start the plastic clamp closed with your fingers until tight. Then use channel lock pliers and make sure all the way clamped until it's hard to rotate the boot on the flange.
- Next, install small clamp same way as the large one.
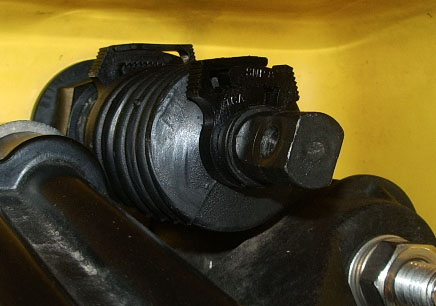
When done, yours should look like below.
Nozzle Installation:
- Apply anti-seize to the 4 13mm bolts. If your model had the 2 o-rings, you need to stick them to the nozzle. This is accomplished using some grease. Apply grease to the o-rings, and place them in the 2 pockets on the top of the nozzle. Carefully install nozzle, and torque 4 bolts to 25 N m (18 lb ft) for aluminum pump, 21 N m (16 lb ft) for plastic pump.
- Attach cables and connections in the reverse order that they were removed.