|
|

|
External Rectifier Upgrade for Sea Doo 947 Carb Models

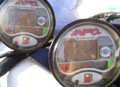
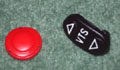
If you’ve got voltage problems on your 947 (951cc) powered Sea Doo, that’s usually due to a bad rectifier. How can you tell if you might have a bad rectifier? An indication of a bad rectifier could be “12V Low” indicated on the display or a battery that won’t stay charged. A battery drain while in storage can also be due to a rectifier problem too. The real kicker is that the rectifier is built into the mpem on ALL carbureted 947 Sea Doos so if it fails, your only option was to purchase a new mpem. Now with my kit you can change to an external rectifier and keep riding for much less expense. This also would be a good addition for preventative maintenance since sometimes when a built in rectifier fails it damages the mpem and if that happens, it would be too late for my kit to help.
What I offer here is a special set of harnesses that allow you to easily connect an external rectifier to your battery and stator so you’re charging at maximum efficiency and output. Another cool feature would be if you’ve bought one of these as a preventative measure since if for some very unlikely reason you have a failure on the external rectifier, by unplugging the adapter harness and plugging the stator harness back into the mag housing you’re back on the mpems internal rectifier.
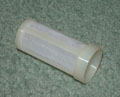
My kit includes the special harnesses and a really heavy duty 4TEC rectifier that I modify to plug into my special harness. Installation is simple taking only a couple minutes and no special tools. Additionally, when I build my harnesses I solder the terminals to the wiring as well as crimp them to ensure the best electrical conductivity and strength. Once this one’s installed, you’re not going to get stranded again due to a bad rectifier and dead battery!
Works with the following 947 powered Sea Doos…
1998 GSX (5625)
1998 GSX LTD
1998 GTX LTD
1998 XP LTD
1999 GSX LTD
1999 GTX LTD
1999 XP LTD
2000 LRV
2000 GTX
2000 RX
2000 XP
2000 LRV
2001 GTX
2001 RX
2001 XP
2002 GTX
2002 RX
2002 XP
EXTERNAL RECTIFIER KIT INSTALLATION…
Tools needed:
- 10mm Ratchet with Extension
- Zip Ties
- Voltmeter (optional)
Procedure:
- Remove the seat(s) and any storage containers to gain access to the front of the engine and battery.
- Using the 10mm ratchet, remove the bolts retaining the positive and negative cables to the battery.
- Using strong zip ties, fasten the new external rectifier in a position where it won’t rest in bilge water (preferably close to the battery) and where it won’t bounce against other components and damage it or other lines, hoses, etc. If you want to fasten it to something with stainless bolts, you should also be able to pick those up at most hardware stores.
- It may be a little tricky but next, unplug the magneto connector located in the front of the engine under the pipe.
- Un-roll and stretch out the kit harness with the plugs for connecting to the magneto housing connector. Plug the harness you unplugged in the previous step into the kit harness and plug the other end of the kit harness into the magneto housing plug. Then thread the other end of the kit harness to the rectifier and connect to the proper 3 connector rectifier plug.
- Un-roll and stretch out the kit harness with the terminals for connecting to the battery. Plug the 2 connector black plug into the rectifier then run the cables to the battery.
- Reinstall the 10mm battery bolts retaining the battery cables with the new rectifier positive and negative terminals.
- If desired, use zip ties and retain the new harnesses to existing cables and/or retaining points to make for a professional looking installation.
- You’re ready to run! If you want to check to make sure the kit is working properly though, fire up the craft on the hose and using a dc voltmeter, check your voltage output at the battery terminals. You should be reading over 14 volts when running.
(If anyone wants to send me pictures of the finished installation with the rectifier mounted, that’s appreciated too!)
Note that as is the case with your local dealer, there is no warranty on new or used electrical parts purchased from me. The reason is that I can’t guarantee some other problem in your electrical system hasn’t damaged your original component and/or the replacement unit. Make sure all other electrical components are in proper working condition before installing a replacement part.
| | | |